
Overview
Launch dynamic programs like Refer A Friend and Drop a Hint with the Extole and Shopify Plus integration. By following this guide, you can place targeted CTAs and experiences throughout your storefront and checkout experiences, track customer activity in real-time, and reward customers using Shopify Discounts.Prerequisites
Integration
Begin the integration from the Partners page in your Extole account or from the Shopify App Store by clicking “Install.” Then, follow the steps below.Step 1: Configure Extole Program Domain & Access Token
First, configure your core settings to begin adding Extole tags to your Shopify storefront.Branded Program Domain
Find your Branded Program Domain in the Tech Center of your Extole account under Program Domains. It’s usually in the format ofshare.brand.com.

Extole Access Token
To generate your Extole Access Token, go to the Security Center and follow the instructions to create a new token. Copy and save the access token in a safe place, as you won’t be able to access it beyond this point.
Add Domain & Token to Shopify
Once you’ve gathered your Branded Program Domain and Extole Access Token, log in to your Shopify account and go to the Extole app. In Step 1 of the app configuration process, paste in your domain and token and hit Save.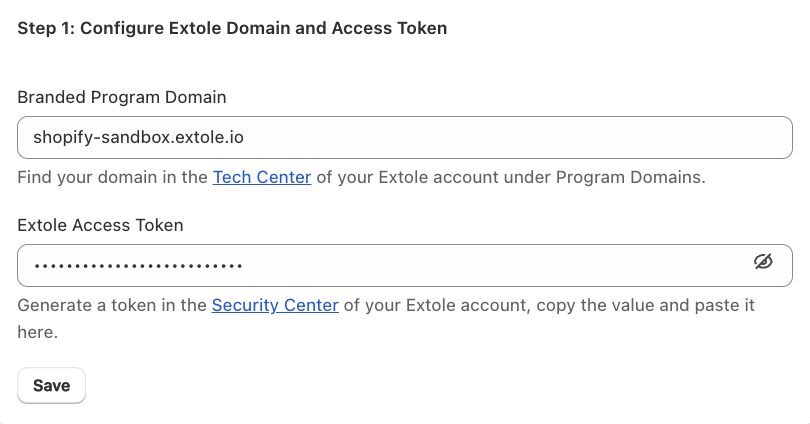
Step 2: Enable Core Settings
Enable your Core Settings to add Extole’s Core Javascript tag to your Shopify pages.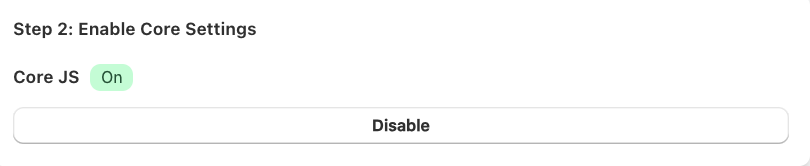
Step 3: Configure Marketing Tags (Liquid themes only)
After configuring your core settings, you can begin to add CTAs (calls to action) by integrating Extole’s marketing tags into your Shopify store. <Callout icon=”📘” theme=“info”> Marketing tags are for Liquid themes only. If you are on Shopify’s headless theme, Hydrogen, you can add marketing tags directly through your front end. See here. Hydrogen customers can continue to use Extole’s app to set core settings, automate discounts, promote through checkout extensions, and send webhook events. </Callout>Enable Marketing Tags
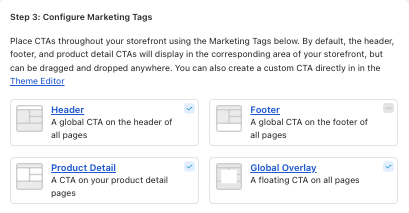
Navigate back to Extole to begin enabling the Marketing tags for the CTAs that you would like to place throughout your store. These can be found in the Campaign Editor for your program in the Marketing tab.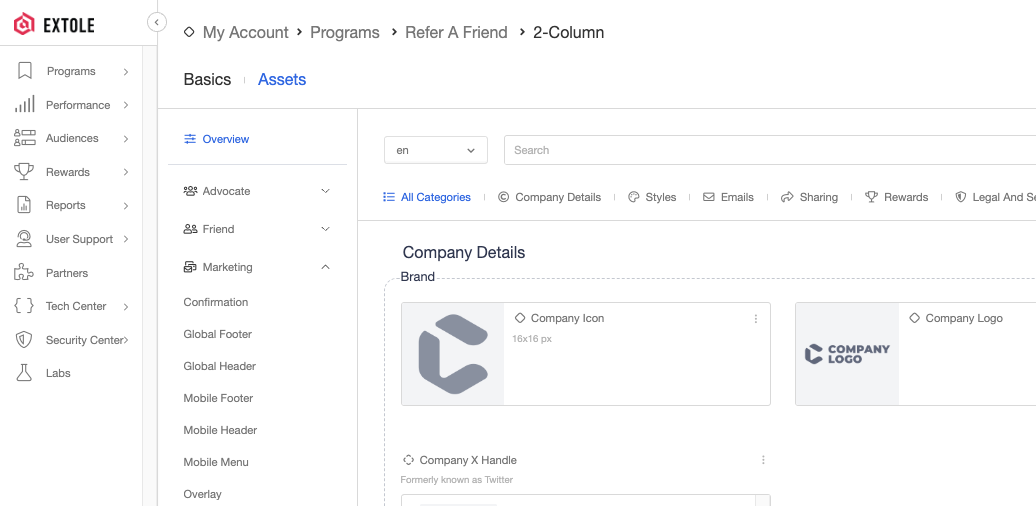 Once you enable the Global Header, Global Footer, Overlay, and Product CTAs in your Extole account, you’ll then need to return to your Shopify account to begin placing the marketing tags throughout your store. Select the Marketing Tags wherever you’d like to market your program (Global Header, Global Footer, etc.)
 Next, in order for Extole content like “Refer and get $20”—to display on your Shopify store, you’ll need to name the zone in Shopify. To name the zone, navigate to the Extole CTA Tag from the Theme Editor menu.
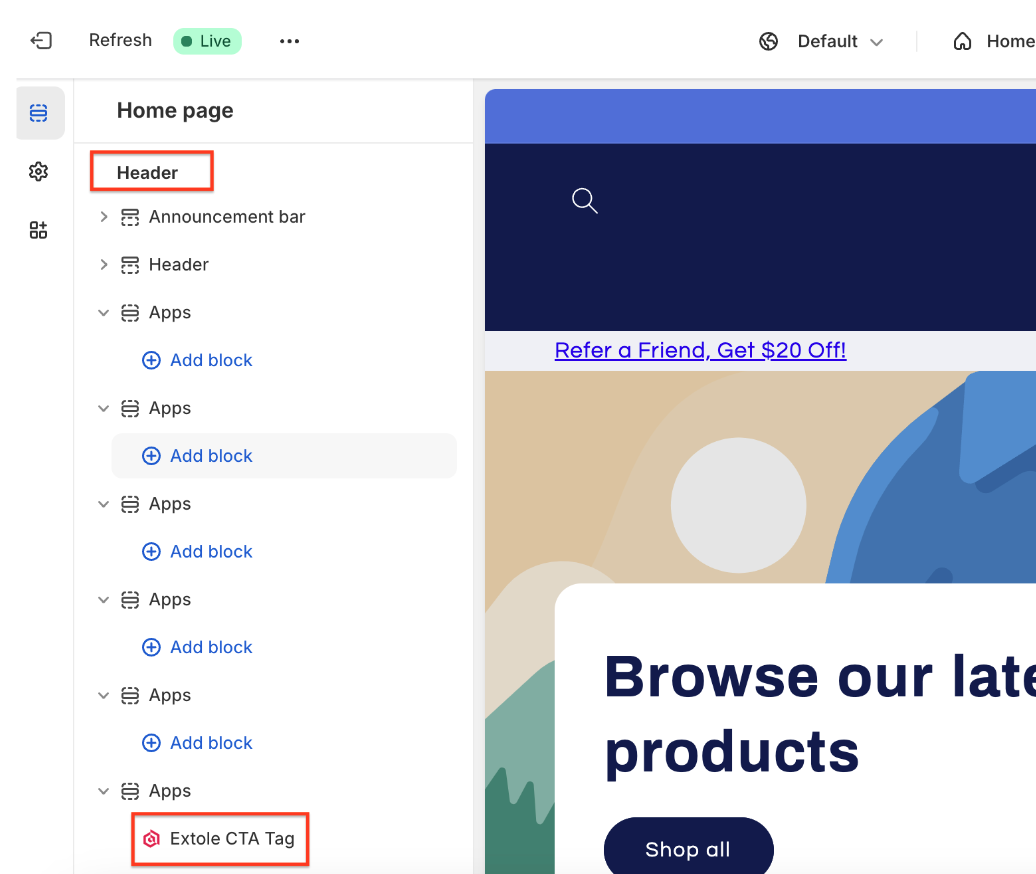 Select the corresponding name in the drop-down. You can also modify the event data that’s passed through the tags at this point.
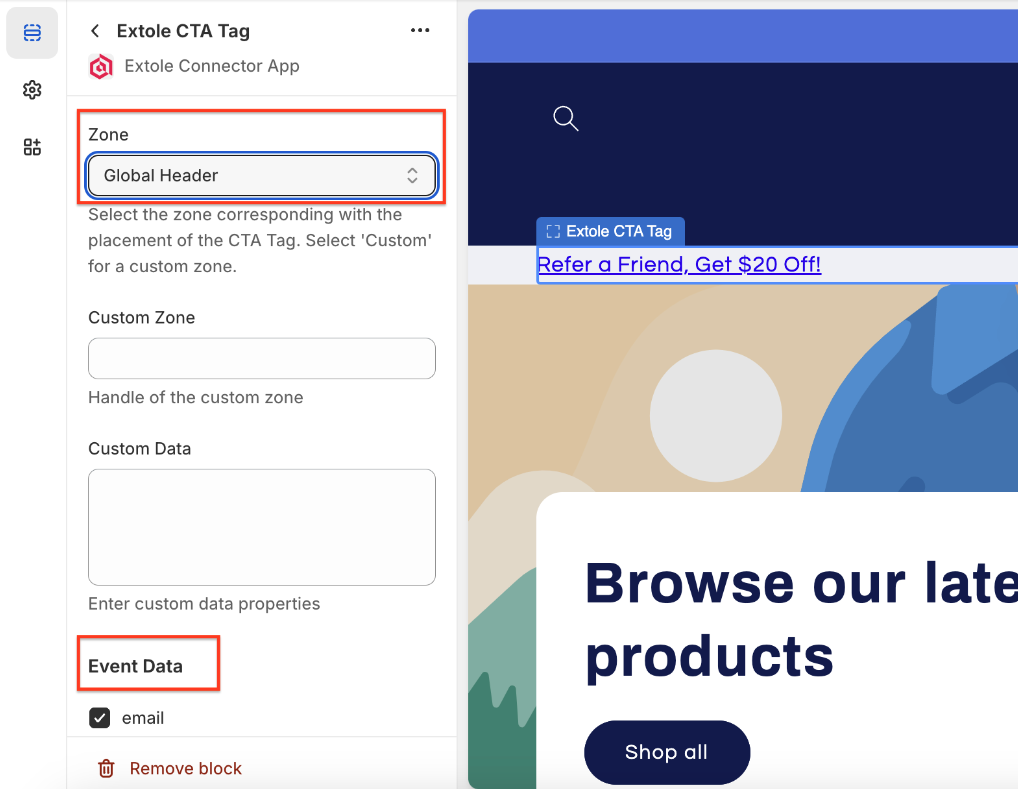 While the marketing tags will automatically display in the corresponding area of your storefront, they can be dragged and dropped anywhere and re-named accordingly using the drop-down and custom zone fields in Shopify’s App Embeds UI.
Custom Data in Marketing Tags
When configuring Extole’s marketing tags, data such asemail, first_name, last_name, partner_user_id, and locale is collected by default depending on the users logged in state. You also have the option to specify any custom data for additional tracking and segmentation capabilities.
To specify custom data in your marketing tags:
- Go to your Shopify page builder and access the Extole CTA Tag from the Apps section.
- Choose the zones where you want to add custom data.
- Once you’ve selected the zone, add the data into the Custom Data field.
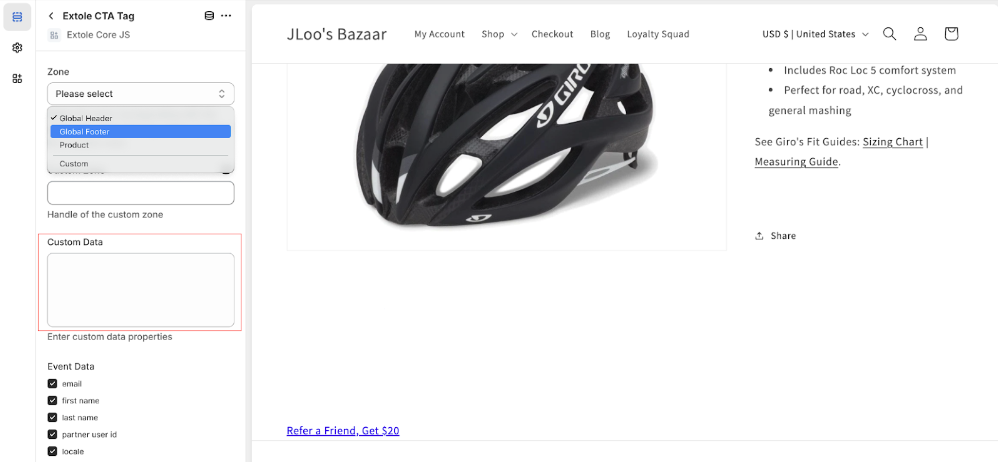 The custom data should be formatted as key-value pairs within a JSON object. You can include both static and dynamic data points.
Example of Custom Data Format:
The custom data should be formatted as key-value pairs within a JSON object. You can include both static and dynamic data points.
Example of Custom Data Format:
extensions.shopifycdn.com
In this example:
static_variableis a static data point with a fixed valuefoobar.dynamic_product_urlis a dynamic data point that retrieves the product URL from the Shopify platform using Shopify’s Liquid syntax{{product.url}}.
{{variable}} to represent dynamic substitution variables. The integration supports a subset of Liquid objects, and support may vary between platforms.
Customization - Create an Embedded Referral Page (Optional)
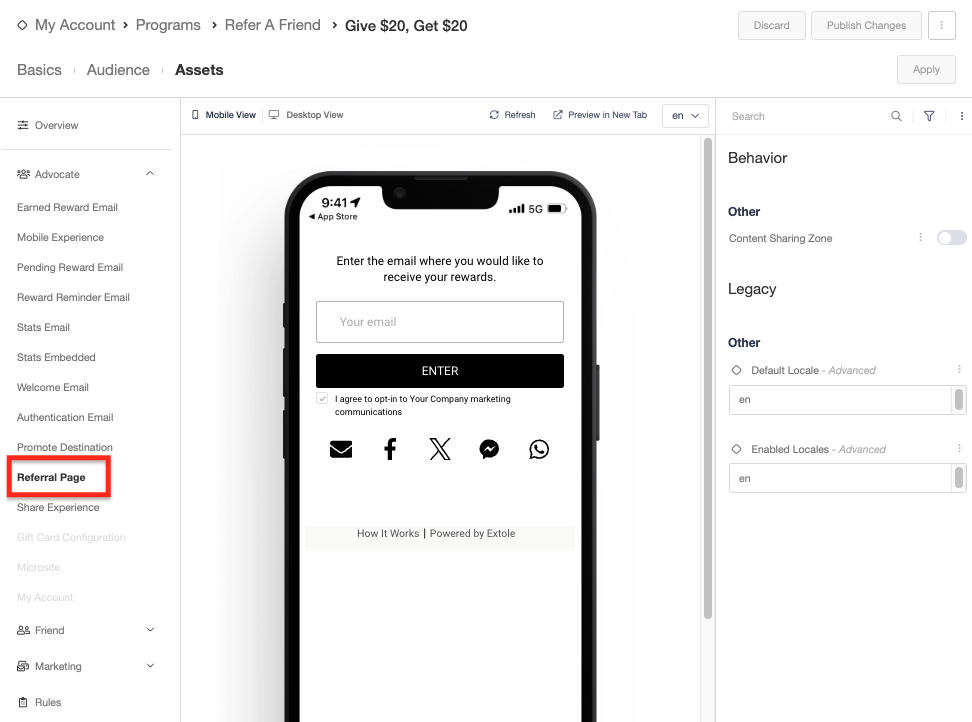
By default, when a user taps on a CTA in your Shopify store, Extole will load the sharing experience via a pop-up that overlays on top of the page. If you prefer to land users on a separate referral page that has the sharing experience embedded onto the page, you can create a new page in Shopify and add a custom App Embed using the Shopify theme editor to embed the sharing experience.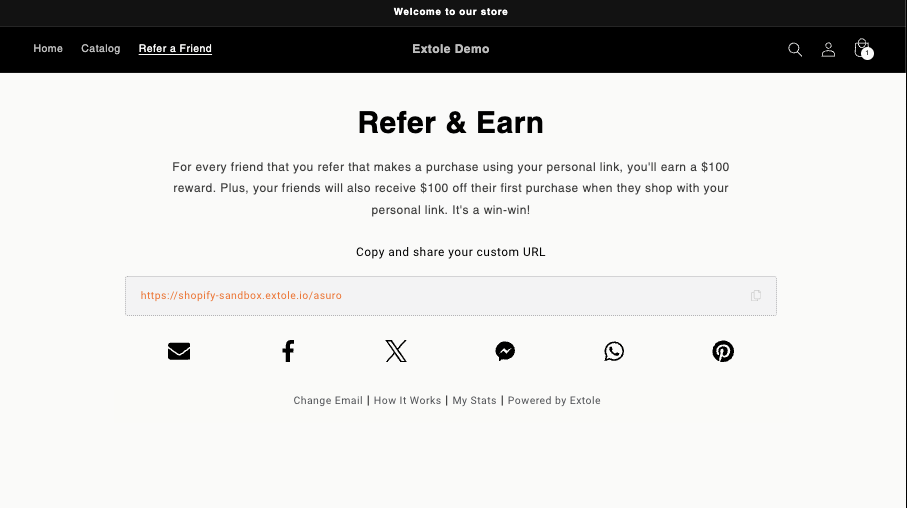 First, configure the following in your Extole campaign:
- Enable the
referral_pagecreative
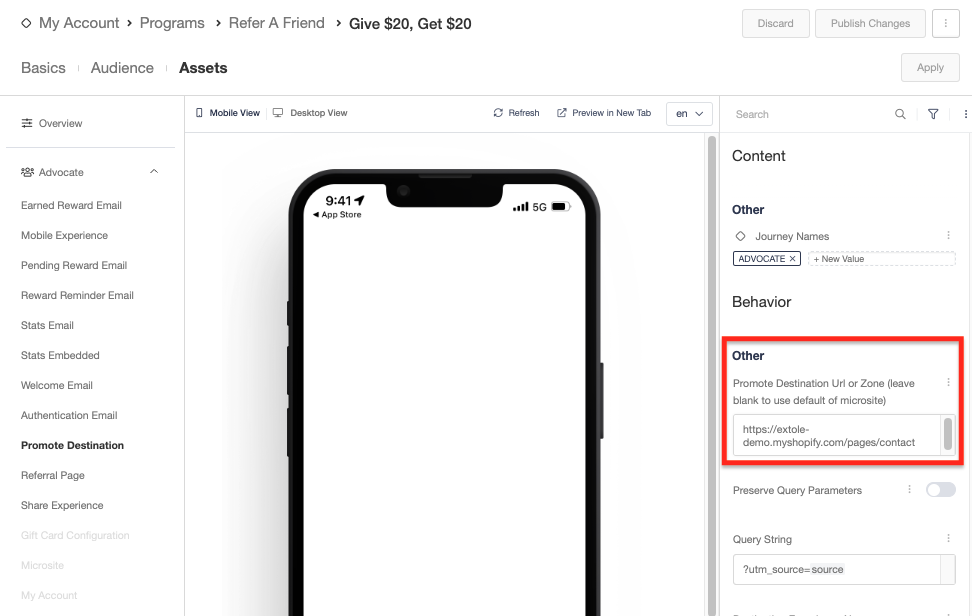
- Enter the URL of the page you’ve created in Shopify as the
promote_destinationURL (“Destination for Clicks on Promotions”)
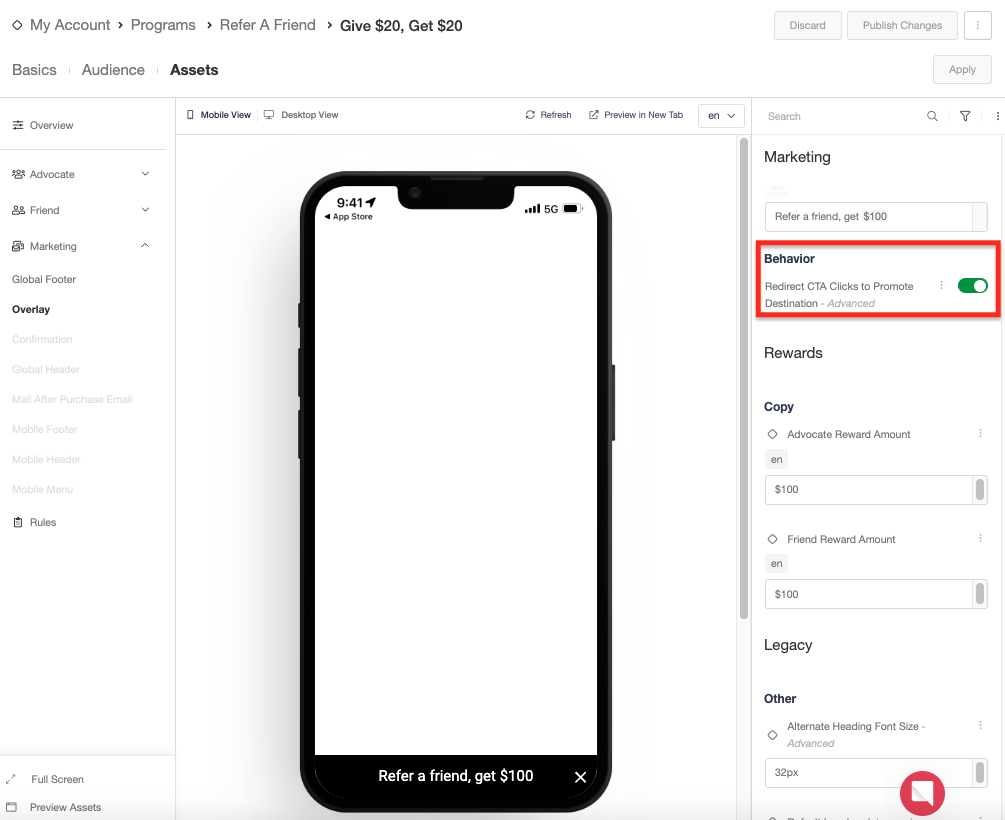
- Update each of your Marketing Zone CTAs to Redirect CTA Clicks to the Promote Destination
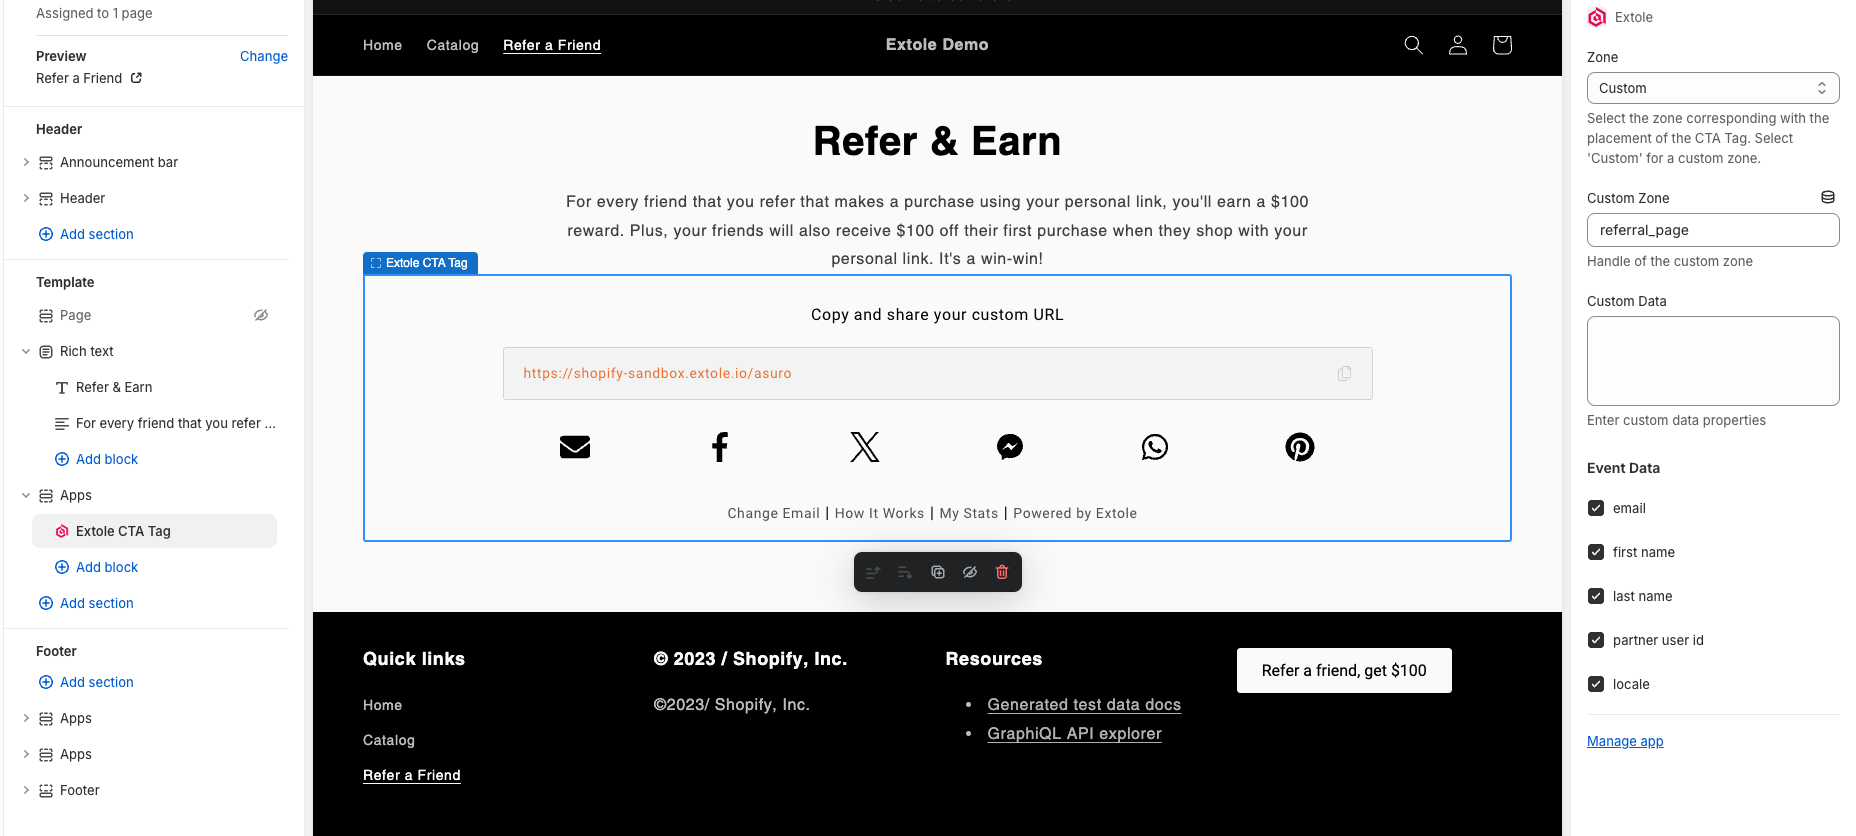
-
Custom as the Zone in the Extole CTA Tag app block, and name the Custom Zone referral_page.
Step 4: Configure Checkout Extension (Shopify Plus only)
Checkout Extensibility RequirementIn order to use Extole’s Checkout Extension on your Shopify store, you must migrate your Thank You and Order Status pages to Shopify Plus’ Checkout Extensibility UI.
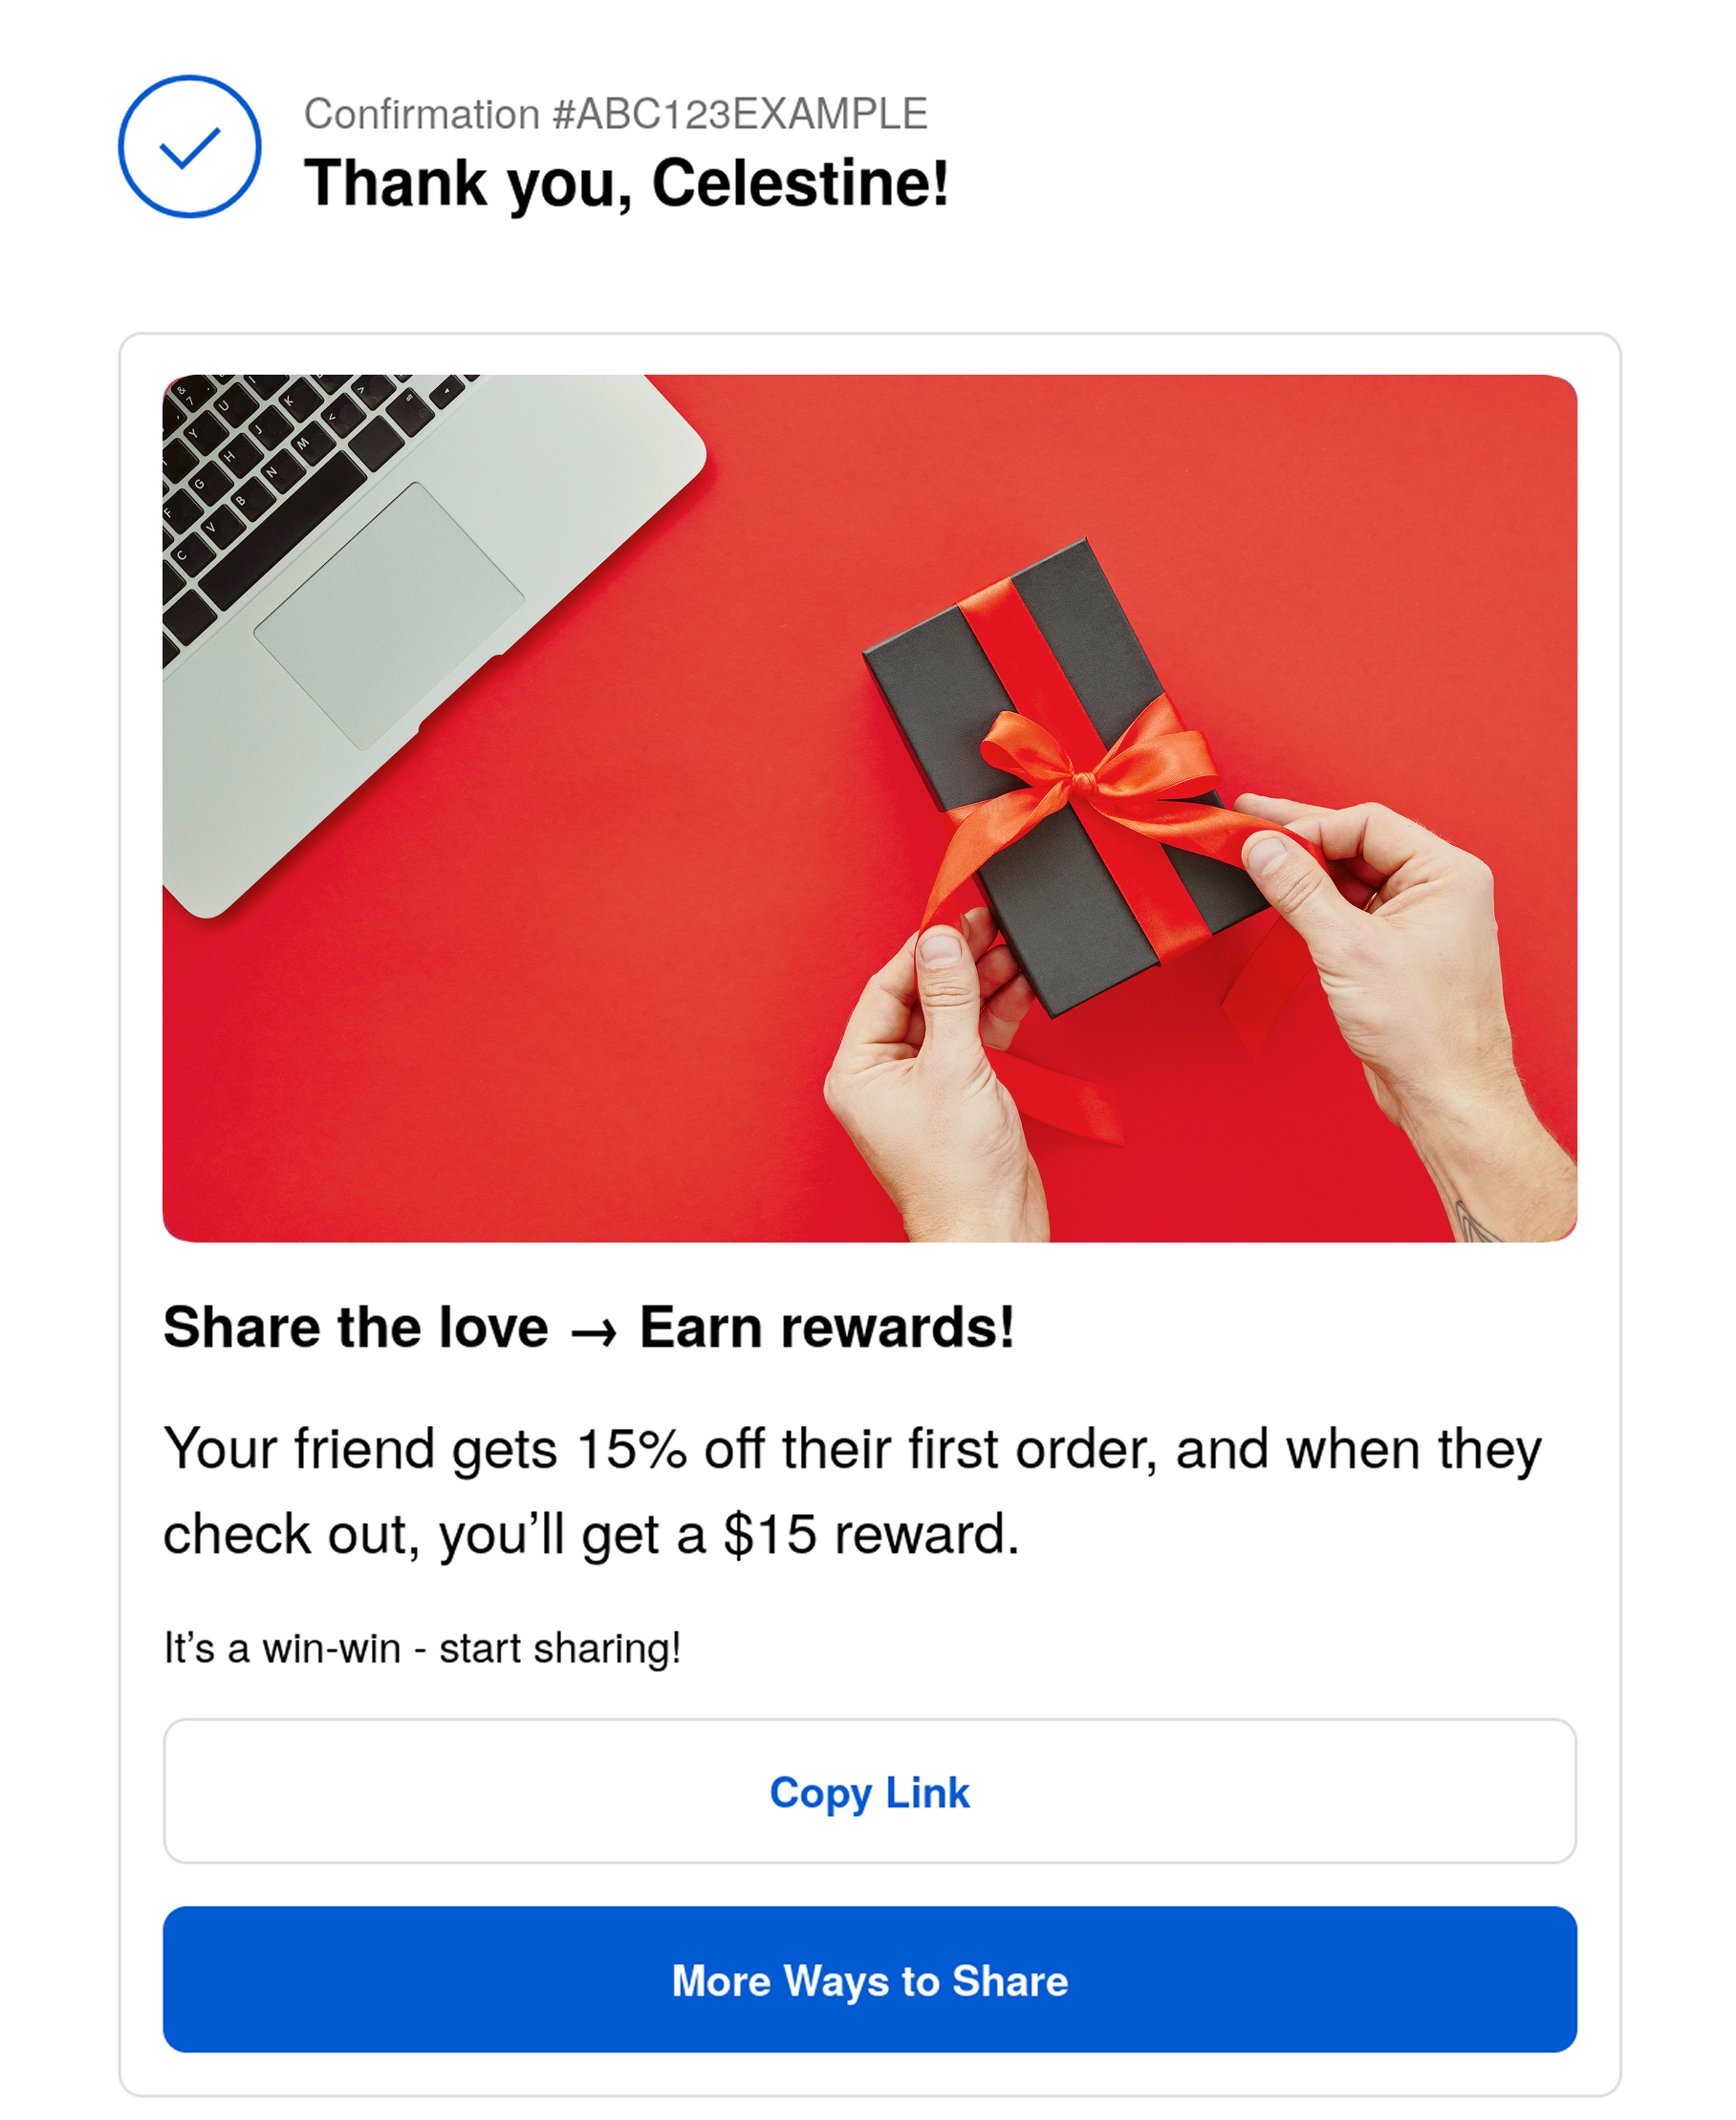
Configuration
- First, add the Shopify Checkout Extension to your Extole campaign by selecting the
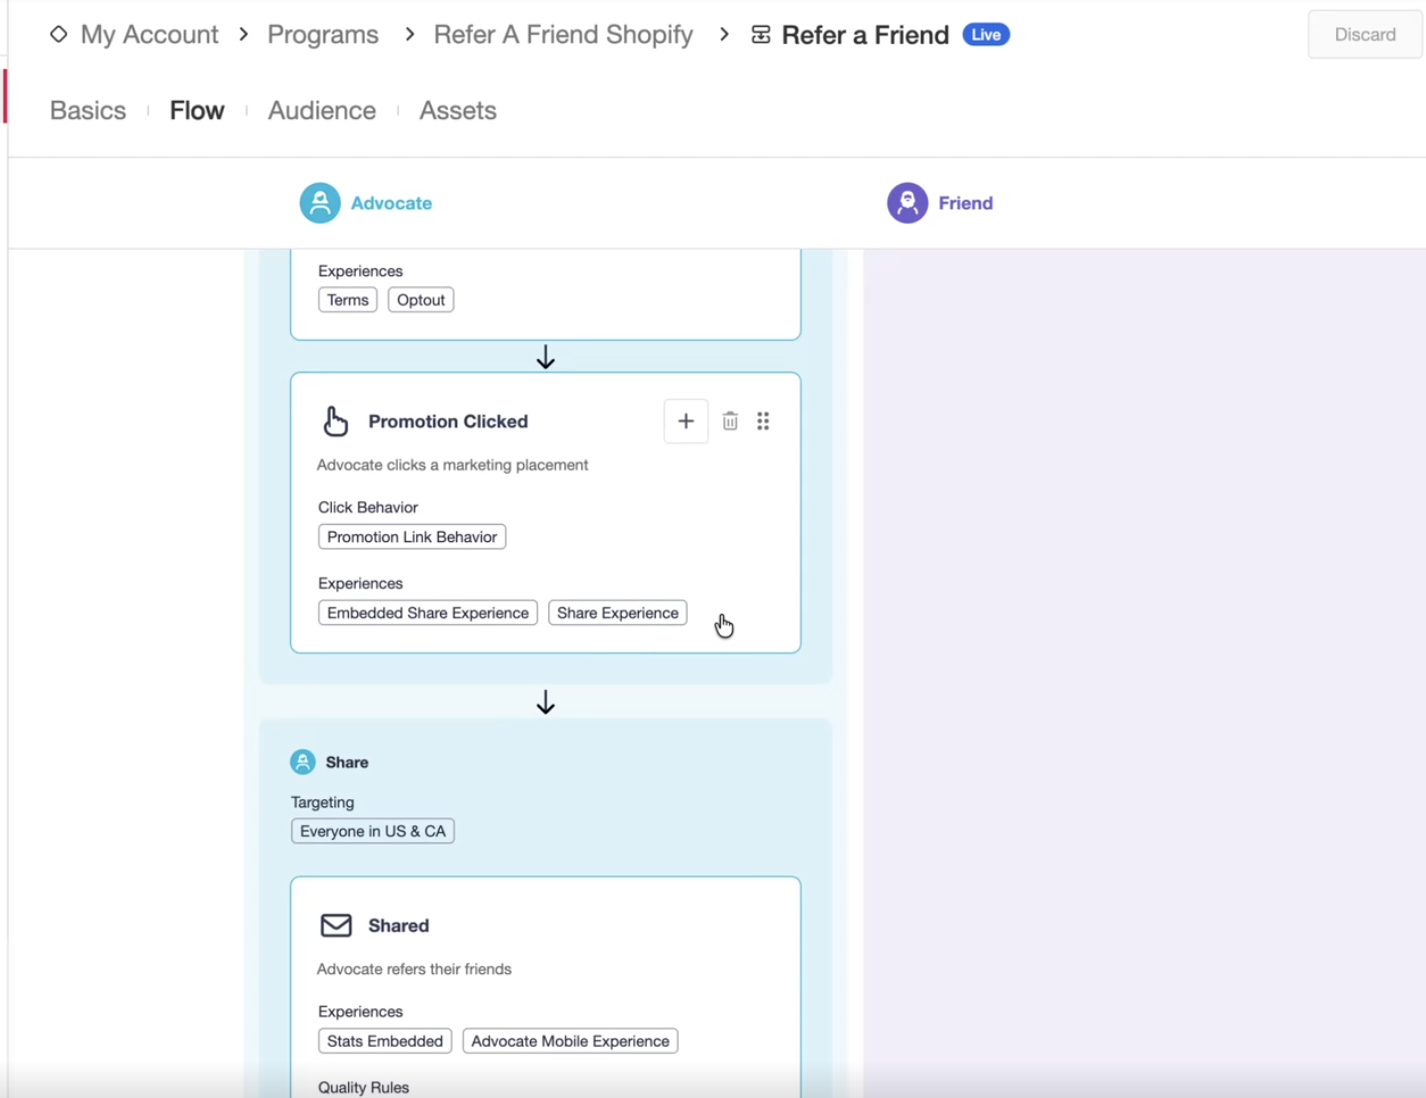
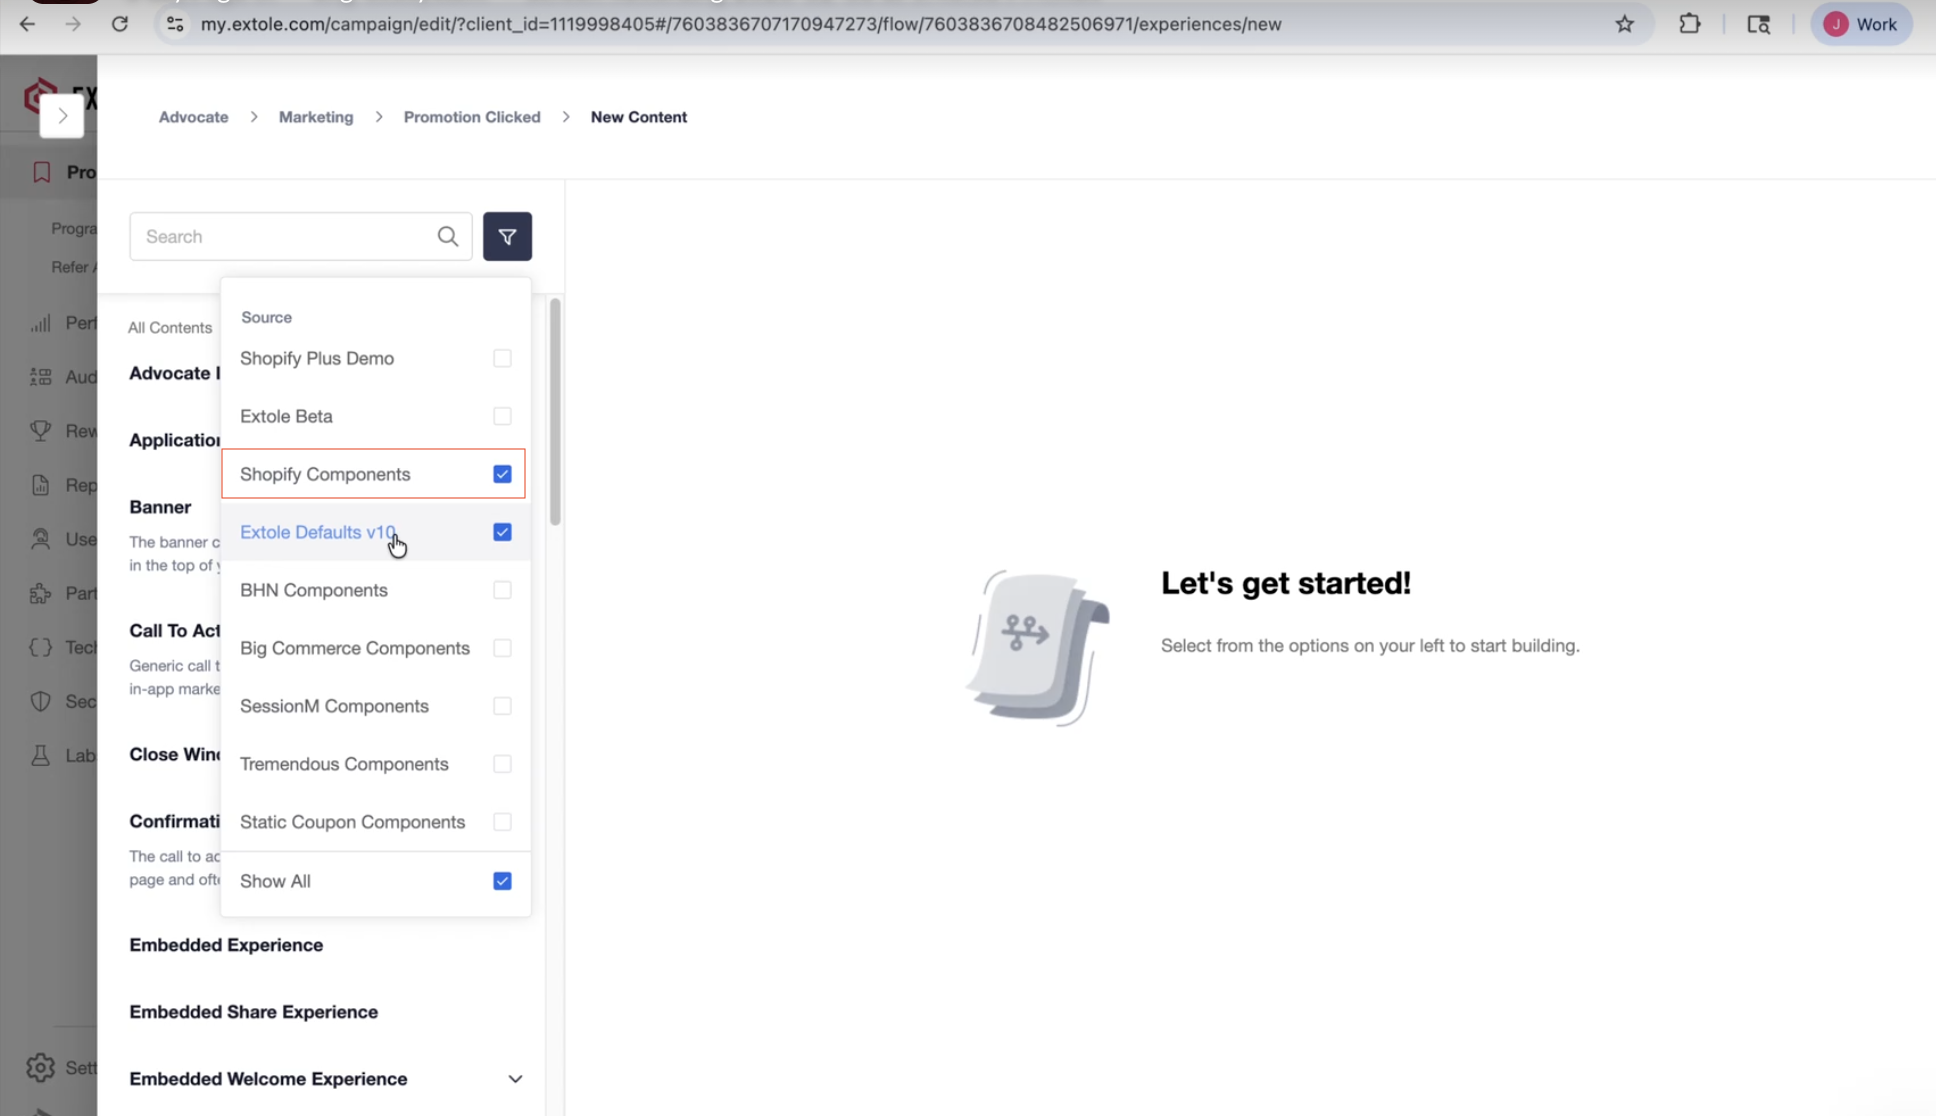
Promotion Clickedevent in Flow Builder. From there, selectNew Contentand click on the filter icon to select theShopify Componentsoption. From there, add theShopify Checkout Extensionand apply changes to your campaign.
-
Navigate to the Extole App admin in Shopify and enable the Checkout Extension.
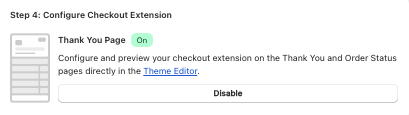
- Then, to place the Checkout Extension on your Thank You and Order Status pages, navigate to the Theme Editor.
-
From the dropdown menu in the Theme Editor, select the “Thank You” or “Order Status” section.
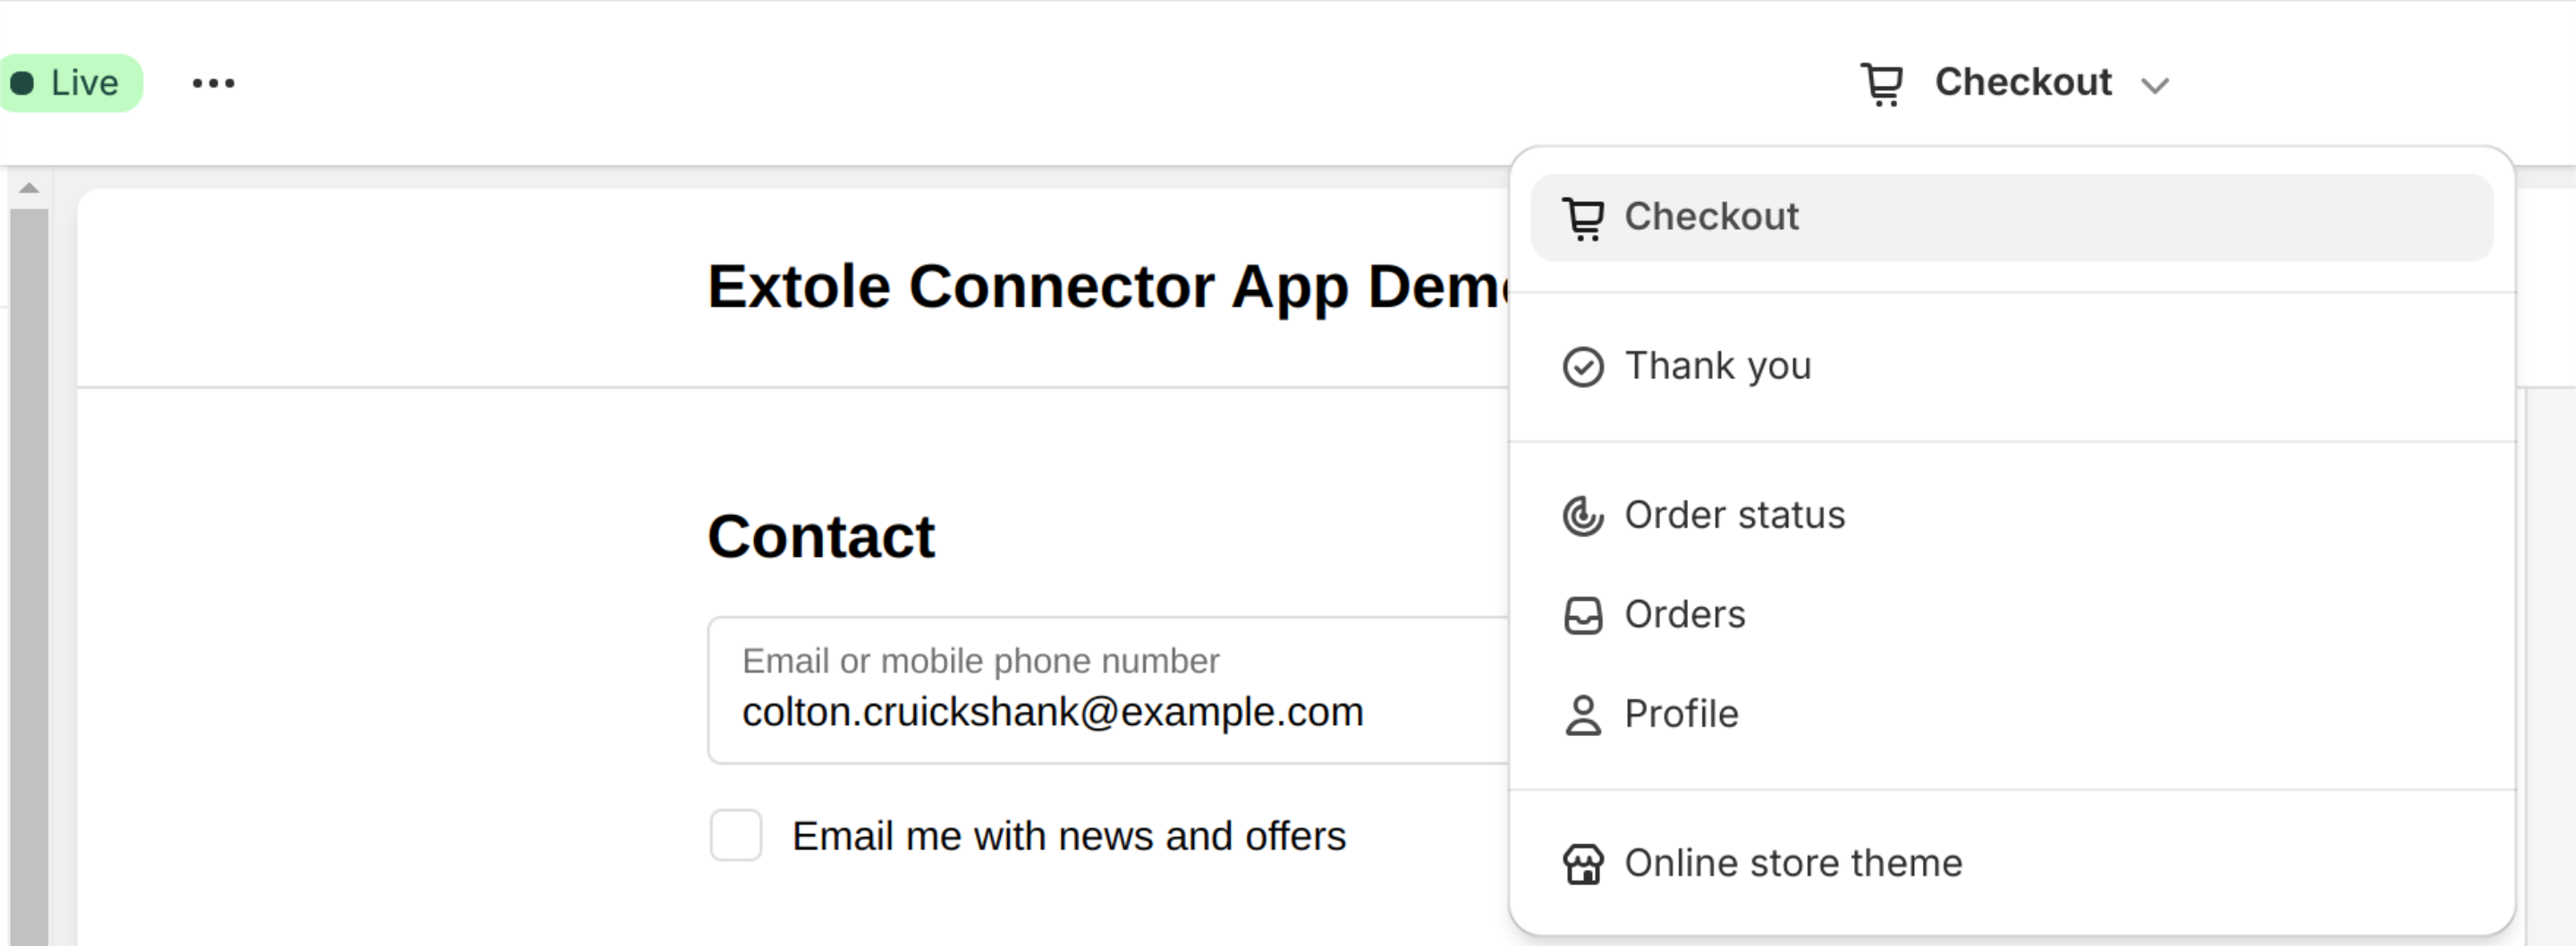
- Click ”+ Add app block” in the Sections area.
- Select the “Extole Checkout Extension” from the list. Once selected, the extension will be added to the page.
Conversion Pixel
By default, when you install the Extole app, a conversion pixel will be automatically added to your Thank You page to send Extole a conversion event. There is no action required to add the pixel to your page.Step 5: Configure Rewards
Follow the instructions below to automatically create Shopify discount rewards for your various programs.Create a Shopify Discount(s):
- Go to the Discounts section in your Shopify admin panel.
- Generate a random discount code as a placeholder for the rewards that will automatically dispensed by Extole. We recommend setting a minimum purchase amount and restricting the discount code to a single (1) use per customer.
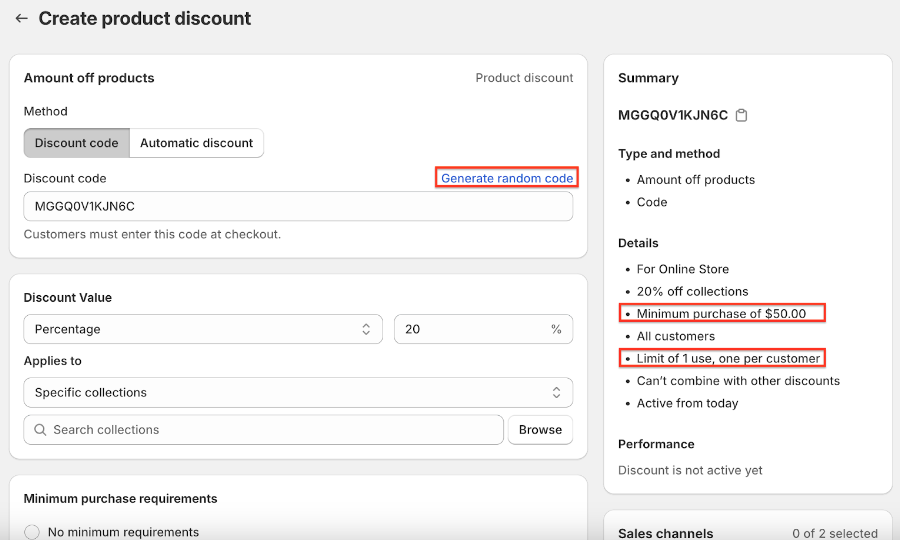
Important NoteIf you are using these discount codes for your referral program, Extole recommends creating separate Discounts for advocates and friends.
Configure your Reward(s) in Extole:
- Log into your Extole account to verify that the Shopify integration was successfully installed on the Partners page.
- Navigate to the Rewards section.
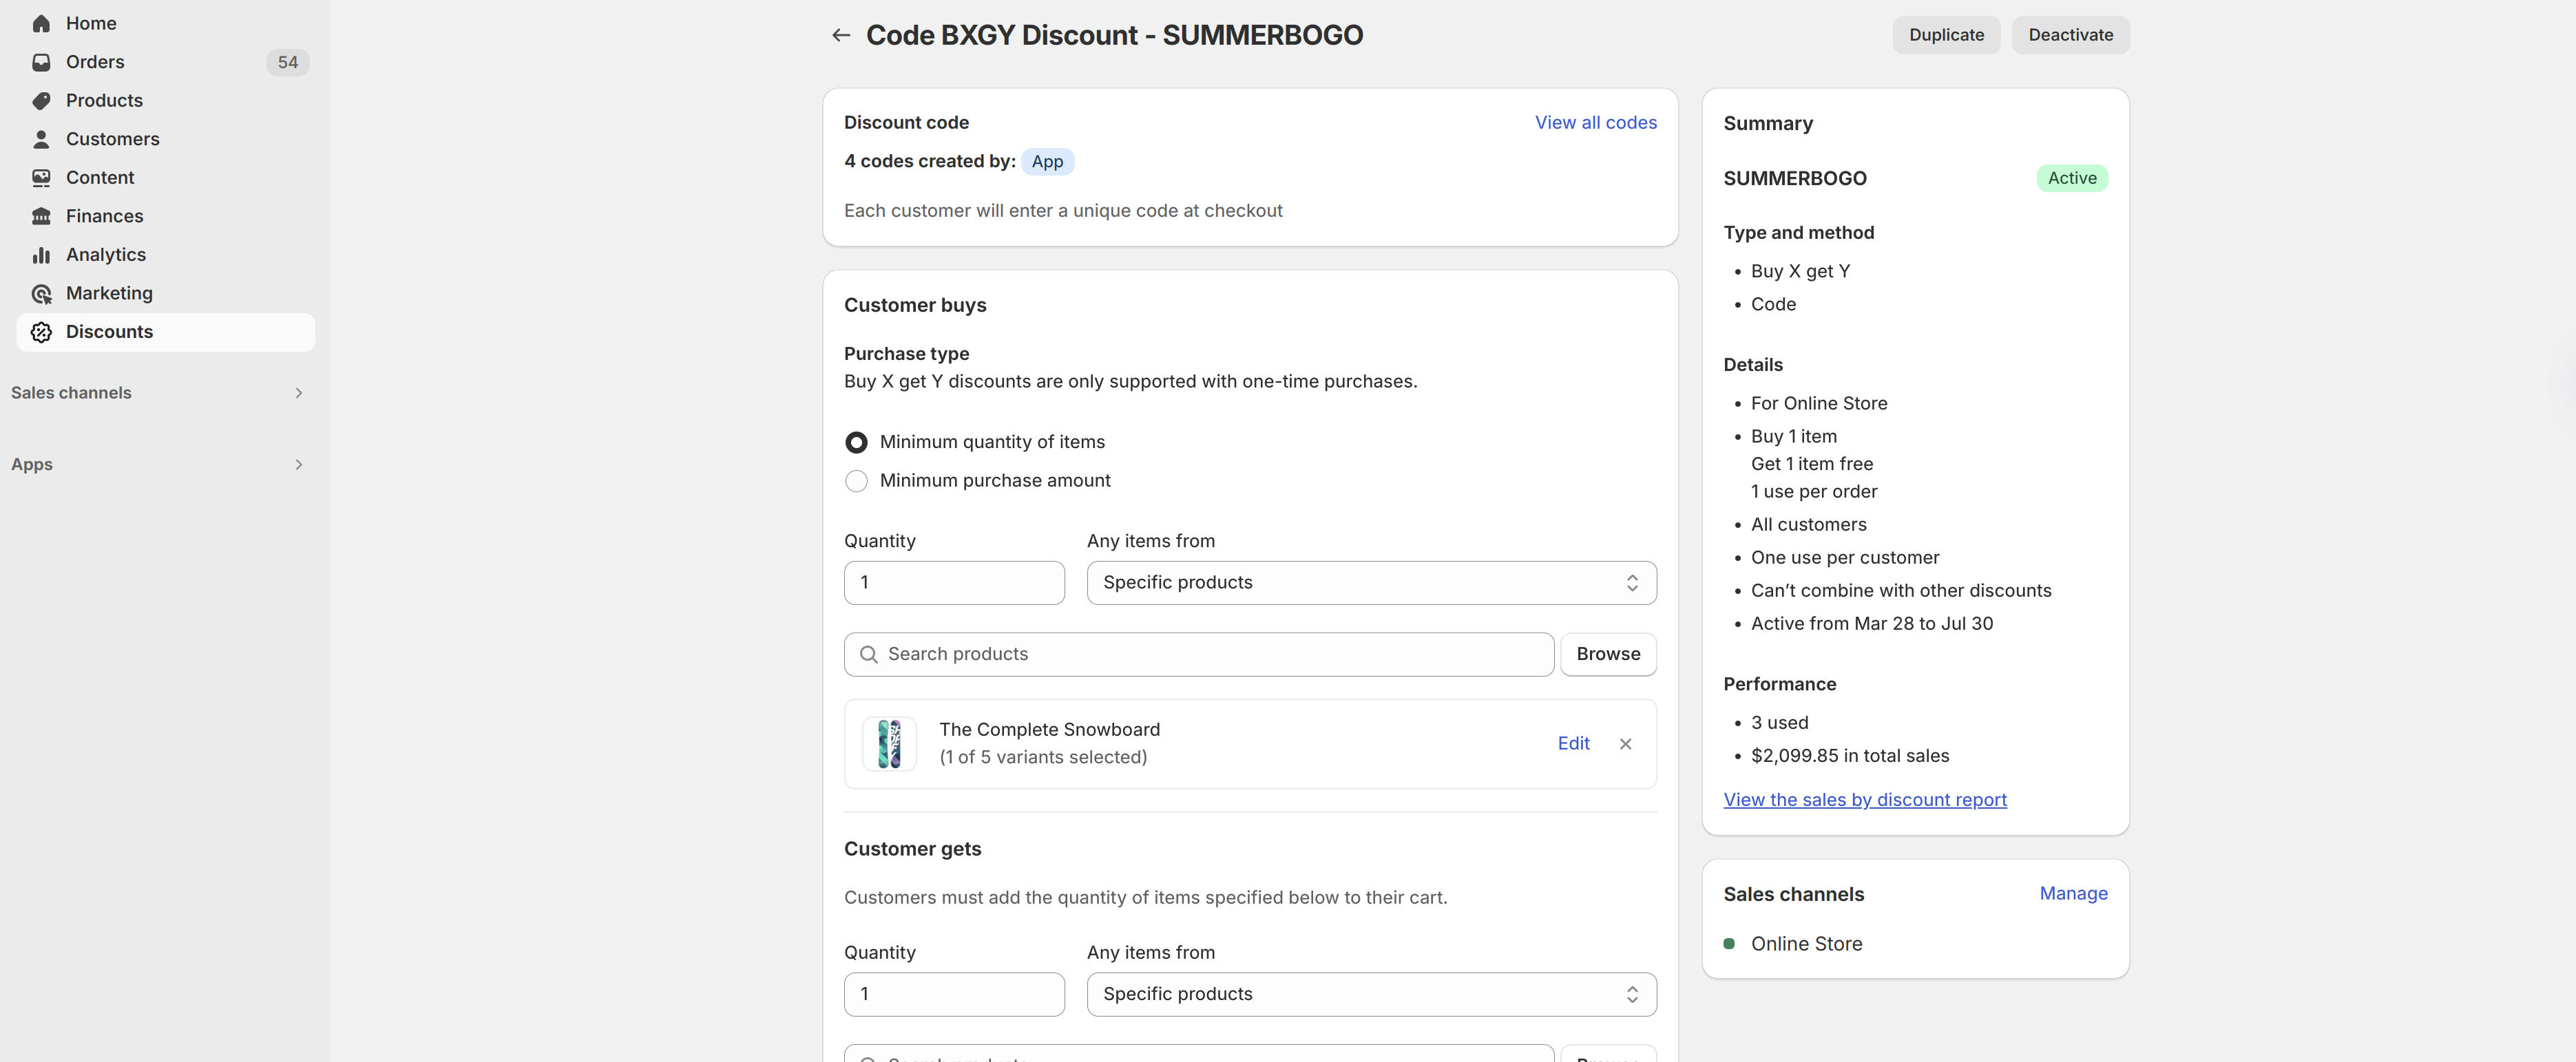
- Select the Shopify Coupons from the Reward Supplier and make sure to indicate a Name for the reward and the Price Rule ID for the Discount you created in Shopify. The Price Rule ID is the unique code that you can find in the discount code details on your Shopify admin panel or embedded within the URL when you edit a specific discount code.
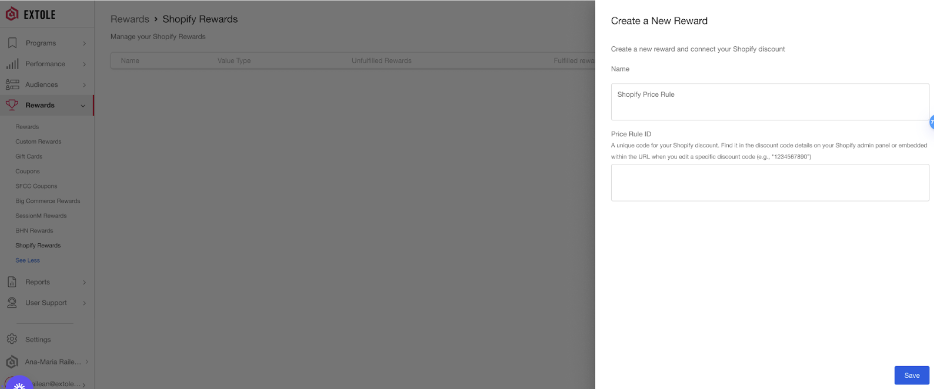
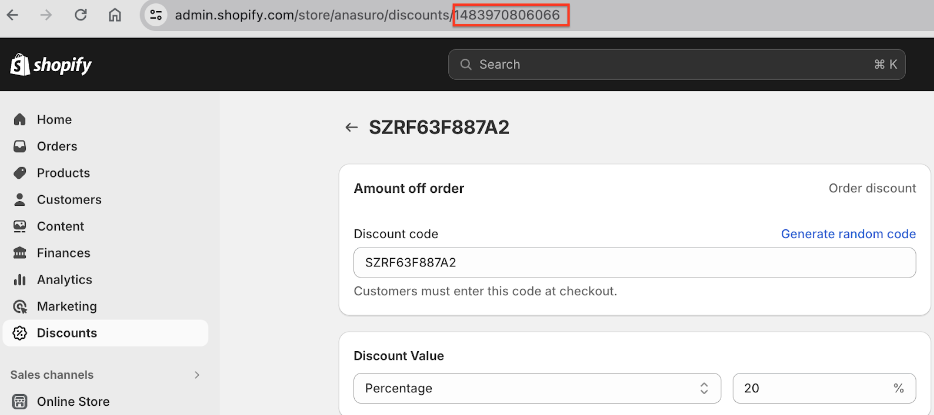
- Save the reward, add it to your Extole campaign, and you’re all set! The integration will automatically generate and issue a new random code each time a participant earns a reward on the configured campaign (see below for an example).
Advanced Configuration
After configuring your core settings, marketing tags, and rewards, you can optionally adjust the notification events that are sent to Extole every time an order is created, fulfilled, and canceled in Shopify. These events enable functionality like tracking, attribution, rewarding, reporting, and segmentation in the Extole platform, so its recommended to stay with the defaults and keep all notification events enabled.Pixel
In the latest version of this integration, there is no configuration needed for Pixel. When you install the integration, Pixel is automatically added to the checkout page.Notification Events
Real-time notifications allow you to track key events in your program, such as when an order is created, fulfilled, or canceled.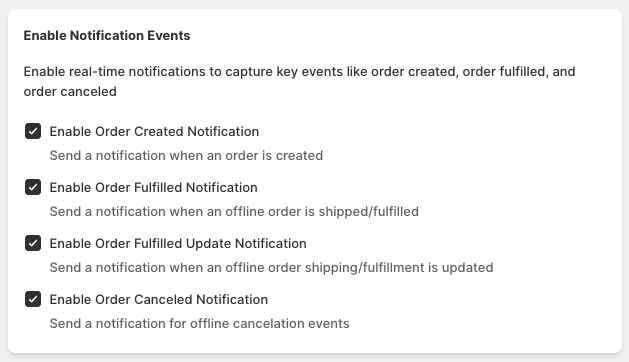
- Enable Order Created Notification: This required notification triggers an event via a pixel and a webhook when a customer places an online order.
- Enable Order Fulfilled Notification: This notification triggers an event whenever an order has shipped. This is particularly useful if you want to trigger rewards in Extole once an order has actually shipped.
- Enable Order Fulfilled Update Notification: This notification triggers an event whenever an offline order’s shipping or fulfillment status is updated.
- Enable Order Canceled Notification: This notification triggers an event whenever an order is canceled. For example, in the Extole platform, you can use this event to create a rule that rewards customers 5 days after they have placed their order, as long as they haven’t canceled their order yet.
Webhook Notifications
To send additional notification events, follow Shopify’s documentation for creating webhooks- Create an Access Token in Extole’s Security Center. Copy the access token and save it in a secure place.
- Select
JSONas the webhook format when creating your webhook in Shopify - Enter
https://api.extole.io/v5/events/{{event_name}}?access_token=XXXXXXXXXXXXXX- Replace
{{event_name}}with the name of the event you want to create in the Extole platform when sending this webhook - e.gorder_canceledorlist_optin - Replace
XXXXXXXXXXXXXXwith the Access Token you created in the Extole Security Center
- Replace
Data Parameters for Online Purchases
When an online purchase is completed, you can specify which data parameters are sent to Extole. These data parameters enable essential tracking and reporting in the Extole platform.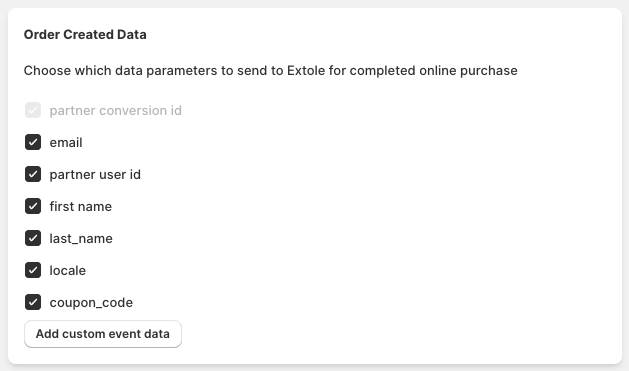
partner_conversion_id: This parameter is essential for tracking. It’s selected by default and cannot be deselected. It typically represents the order number or a unique identifier for the transaction.- Additional data parameters are included by default, such as
email,partner_user_id,first name,last name,locale, andcoupon_code: These parameters provide more context about the customer and the transaction, which can be useful for segmenting and analyzing your data.
Custom Event Data
If you want to track additional data that is specific to your business, you can indicate custom key-value pairs. For example, you might want to track the product category of the purchased items or the marketing channel that led to the referral.
Multiple Shopify Stores
We support multiple Shopify stores in a single Extole account. For example, if you have US Shopify and UK Shopify stores, you should take the following steps.- On the partners page, install the Shopify partner integration and rename it “Shopify US”. Then, install another Shopify partner integration and rename it “Shopify UK”.
- On the programs page, create two programs. One program will be targeted to your US users, and the other will be targeted to your UK users. If you have existing programs, you can modify those instead.
- On the rewards page, set up two new reward suppliers. Click ”+ New Reward”, “Shopify Discounts”, and complete the information on the following page. For the first reward supplier, select that it will be used with the “Shopify US” integration, and select “Shopify UK” for the other reward supplier.
- Finally, navigate to each specific campaign, and in the “Promotion Clicked” business event, select ”+ New Content”, and add “Shopify Checkout Extension”. Fill out the required fields for the Shopify Checkout Extension, and those values will be sent to Shopify to create the post-purchase referral promotion.